

Create a materialize effect for any model quickly and easily. Warp in models with a variety of pre-set effects such as voxelize or a cool burn in transistion.
Theses effect solves the issue with hollowed models. These effects do not cut away or mask out the model but instead use a clever technique in projecting a filled in look to the existing geometry. Just apply the material function to any existing material node to drive the effect you want.
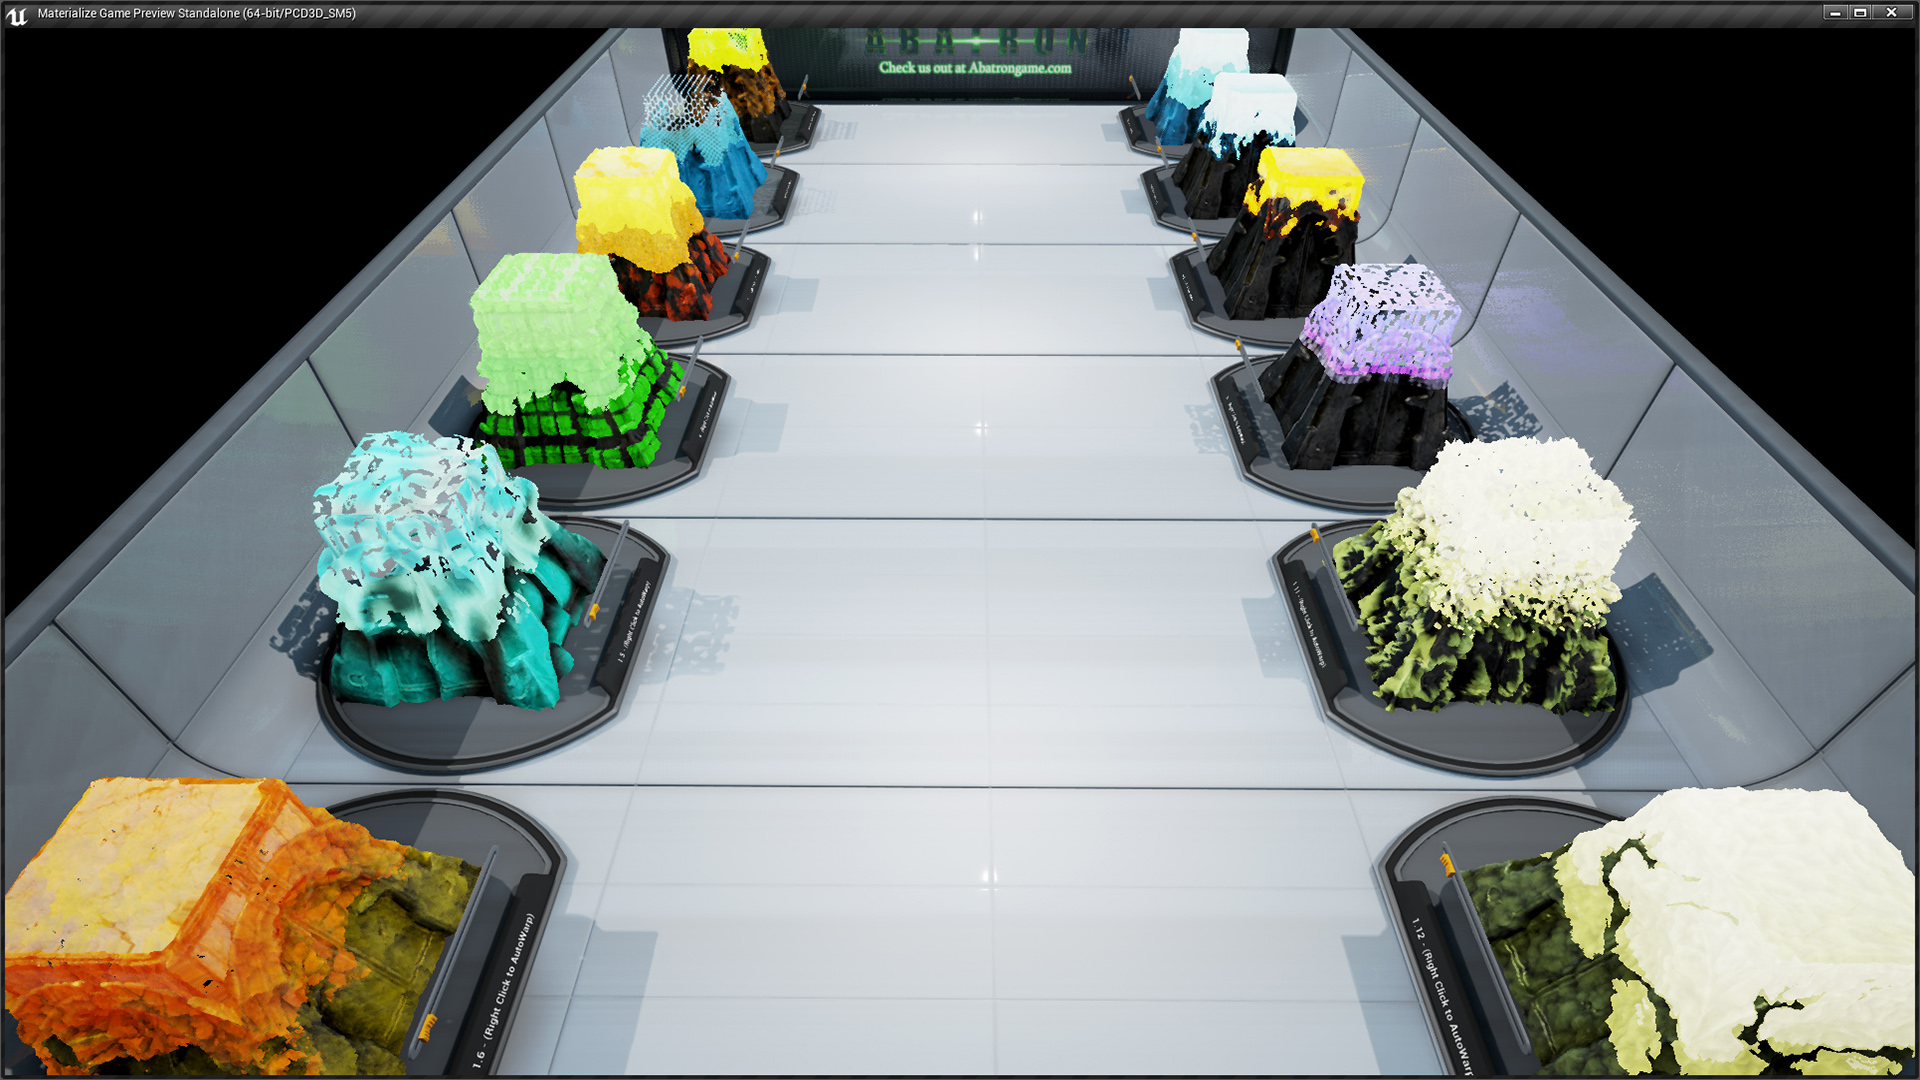
A single parameter input from 0-1 drives the entire effect for easy integration. In addition, you can use these effects for surface effects besides just warping in. Create an icy frost effect or burning effect on the surface of the model. Spectral effects, pixelating effects, and the lists goes on. These effects are completely customizable with many options exposed. Drop in new patterns, change colors, or use specific parts of the effect. The provided demo room is a great place to start. It's also great effect for learning by breaking down the shader which is fully documented.
Step 1: Pack Setup
You will find all of the asset pack contents loaded into the Materialize folder. Under that folder, there are 3 folders and the main material function MaterializeVoxelUp. The material function is the common node shared to all of the material effects so be careful changing values directly inside of it. If you decide to customize it, make a duplicate copy. =)
Folder "DemoRoom": Is just props needed to show off the asset and is not needed beyond demo purposes:
Folder "Materials": This folder contains Preset Material instances that you can use to plug & play effects I have already setup for you. I will talk more about this below.
Folder "Textures": This folder are the raw textures mostly noise patterns used to drive the effects.
Step 2: Model Material Setup
First thing to do, is to decide how do you want the effect to work with your model? Do you want the master effect always in the background of your normal model or not? In Abatron, I actually duplicate the material so that I have both a Effects Material and Regular Material. That way I can switch out the material when I want to use the effect or back to the normal material. This way I can be more performant and also avoid clashes with complicated shader setups over the lifetime of the model.
For the example, lets duplicate your existing material and name it accordingly ###_Materialize. Open up the new material inside of the material editor and lets begin the fun.

Right click on the grid and type "MaterializeVoxelUp". It shows up under the VFX category. Select on it to create the node in the editor. Currently, the only inputs required is the BaseColor and Metallic attributes. Select the material node and ensure that it has the following options selected: "Surface", "Masked", & "Default Lit".

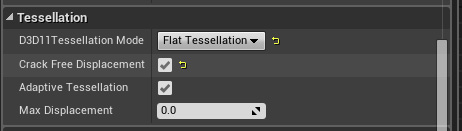
Additionally, the material needs to have Tessellation turned on as shown. Flat Tessellation and Crack Free Displacement turned on.
Next, input your BaseColor and Metallic directly to the "MaterialVoxelUp" node. As shown in the picture. Go ahead and hook up the Material Function's output to your material inputs. Its important that you let the "MaterializeVoxelUp" override any existing hookups. BaseColor, Metallic, EmissiveColor, OpacityMask, WorldPositionOffset, WorldDisplacement, and TessellationMultiplier all need to be hooked up directly to the material and not modified or combined with other parameters.

All other inputs such as Roughness, Normal, & ect... can be hooked up normally.
Step 3: Setup the Instance
Now that the parent material is setup, you now need to setup an instance of that material so that we can configure the desired look of the effect. Once created, apply the instance to the model so that you can visualize the settings realtime or add it to the material editor viewport. Then open it up and lets look at the paramters.

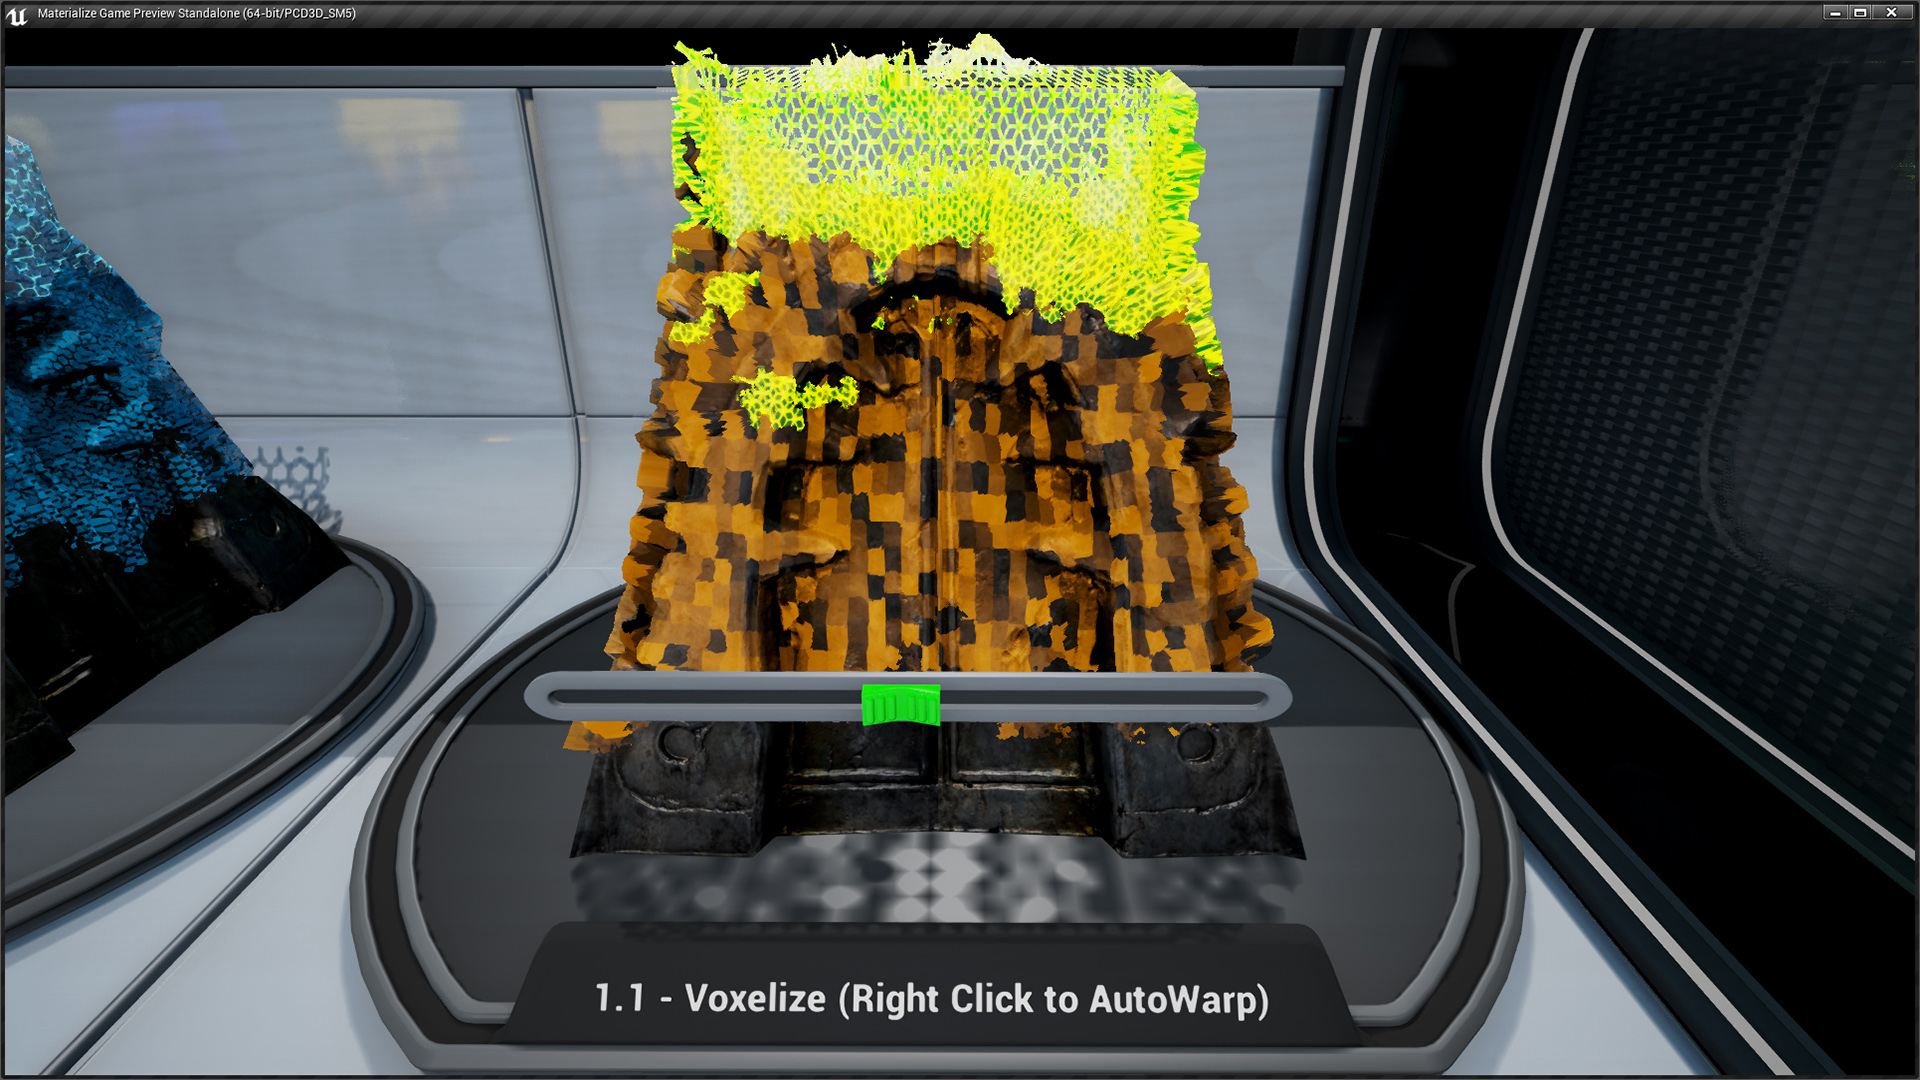
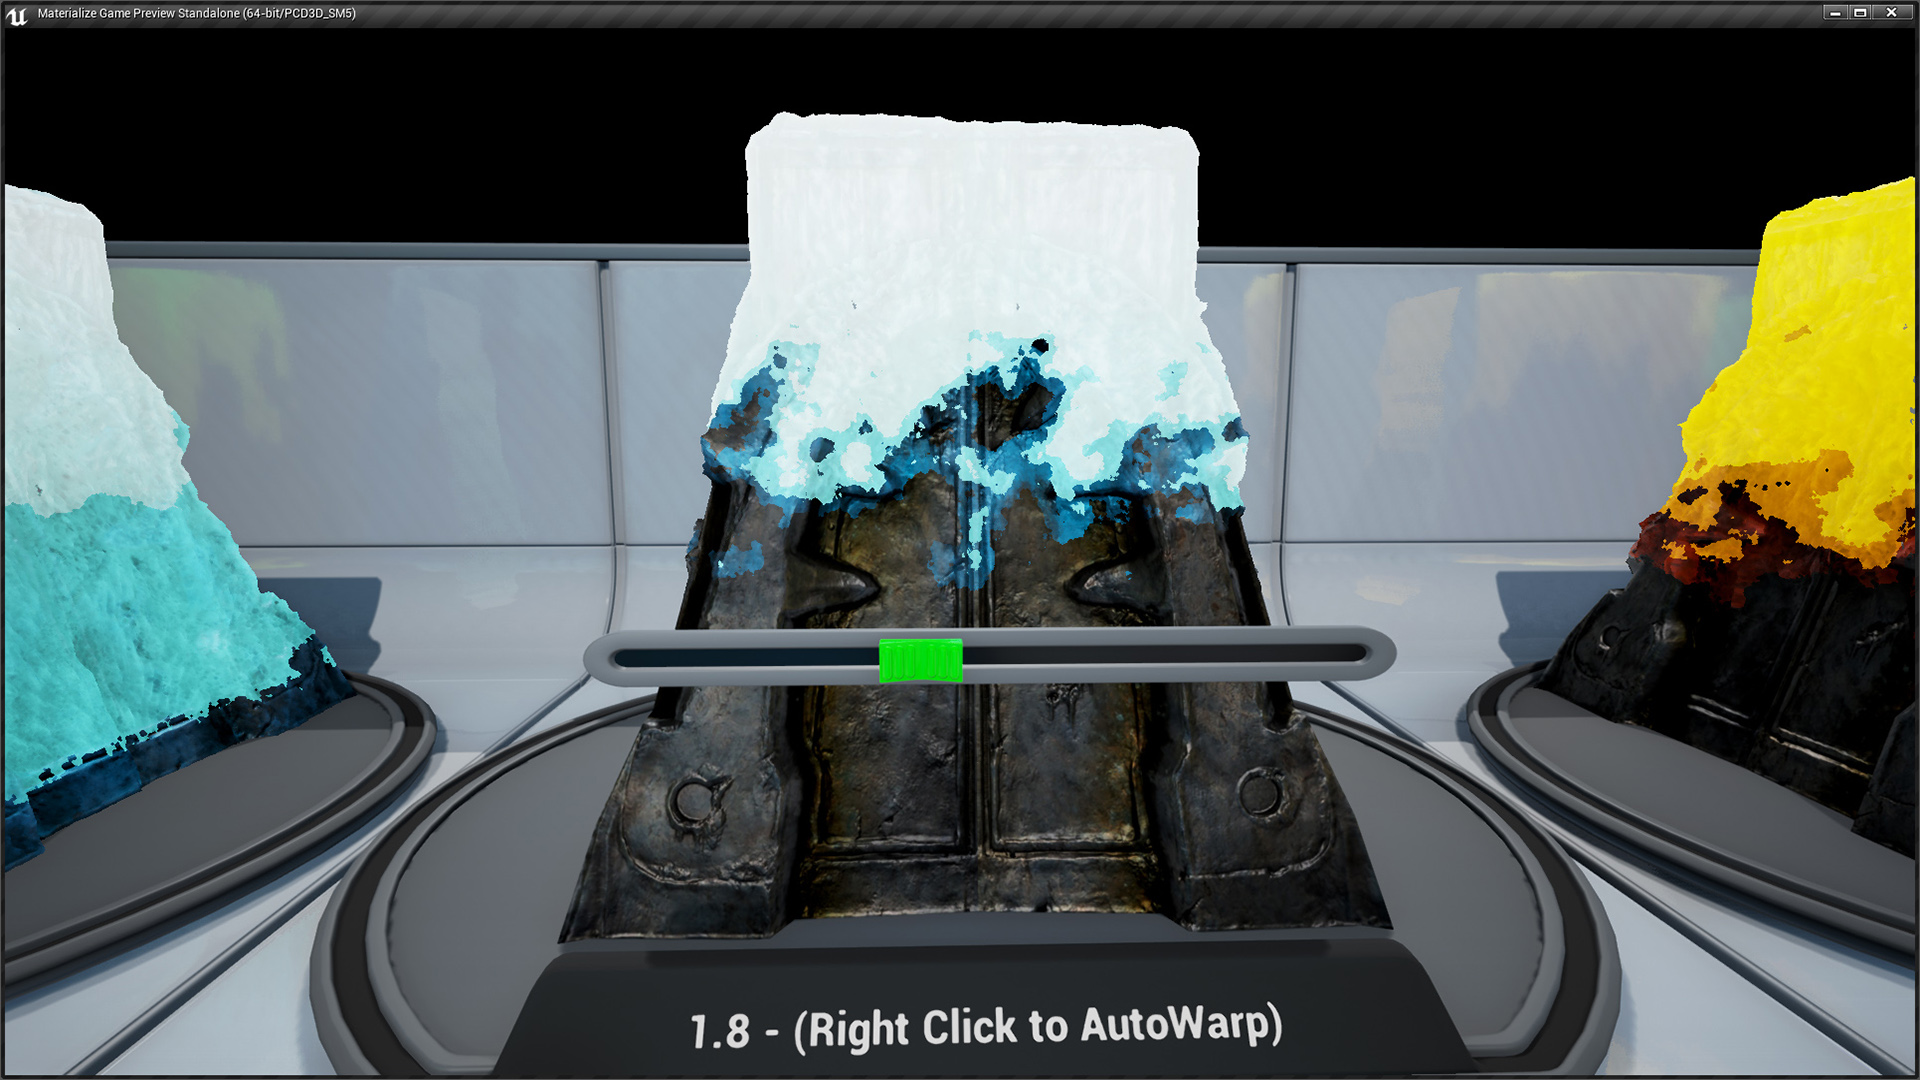
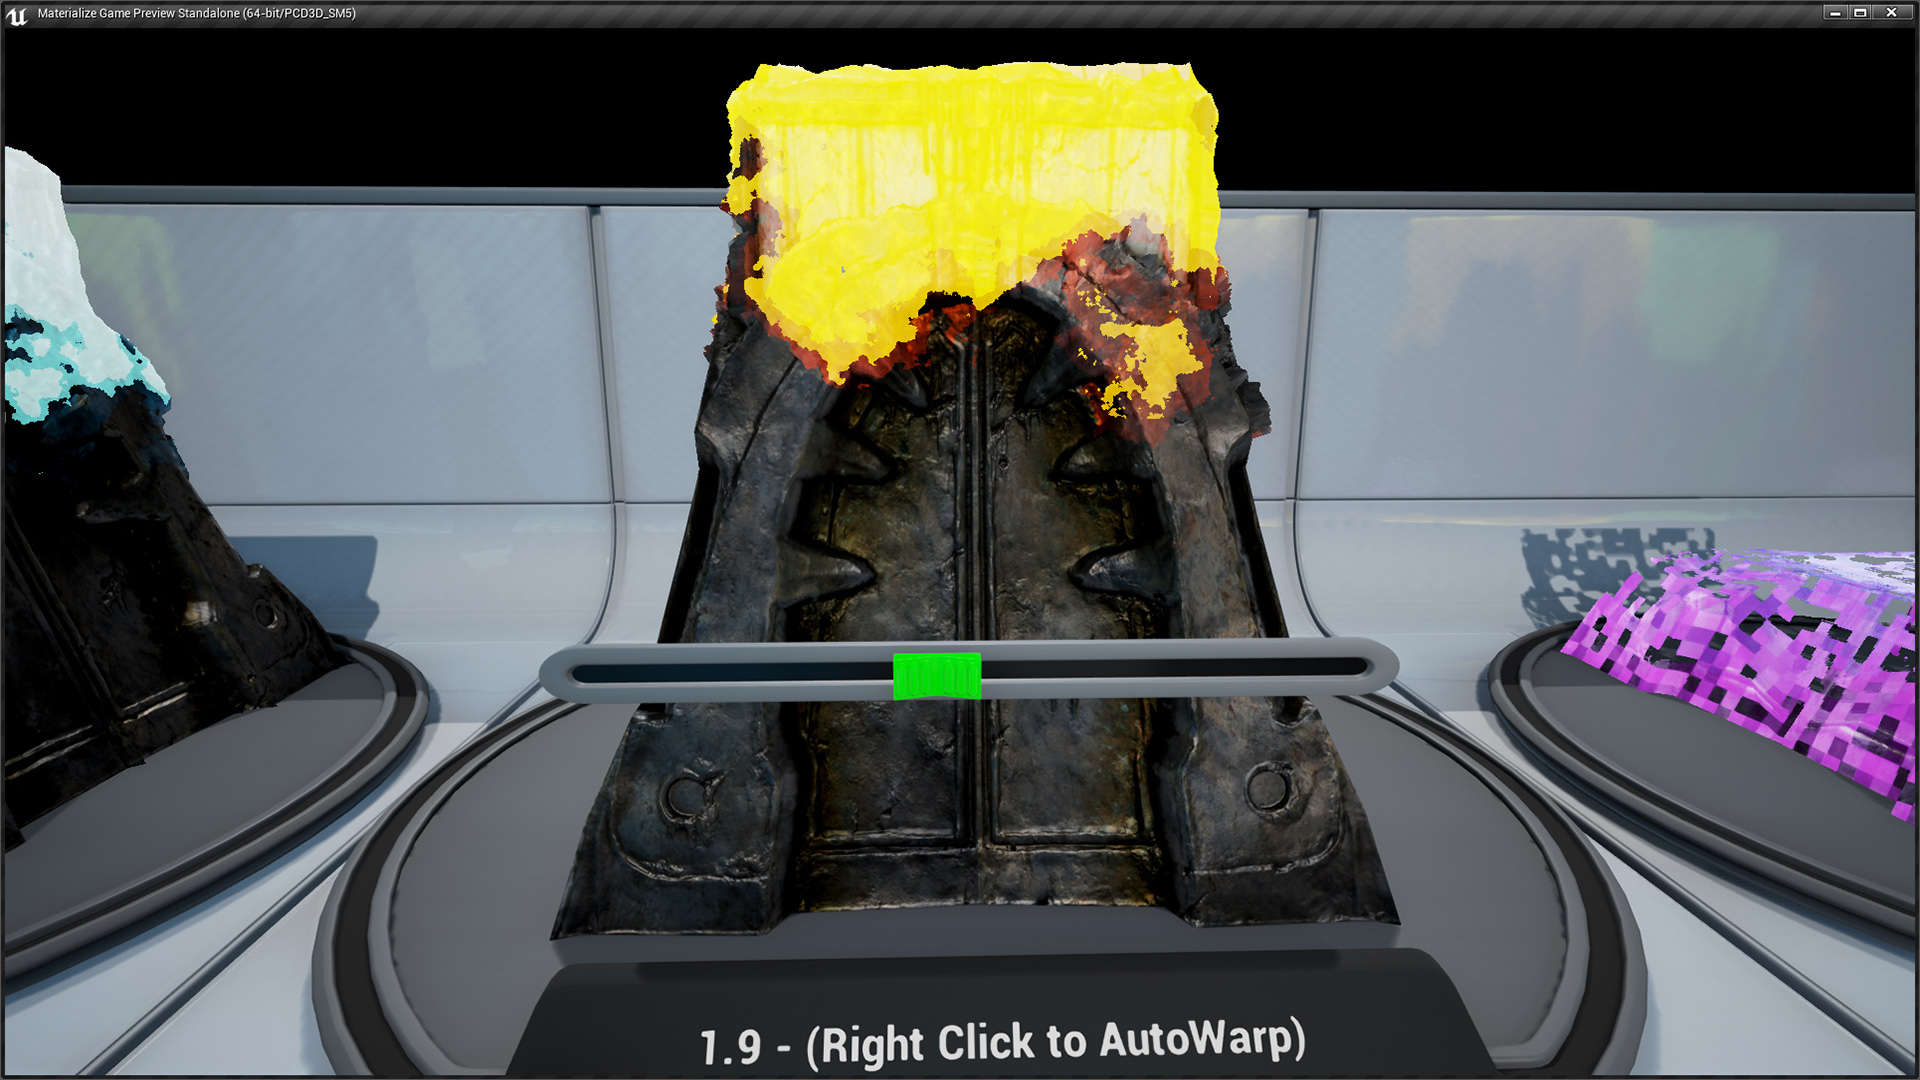
To get the effect up and running quickly, the three main parameters for the effect is the "Materialize Amount", "FringeDisplacement" and the "MaxHeightOfModel". Once setup, the effect is ready to go.
MaterializeAmount: This is the primary driver to execute the effect. A value off 0.0 is effect at its starting point and lowest point. When driven to 1.0, the effect cycle is completely over and at its peak transistion state. You can drive the effects with blueprints, timelines, or programmatically.
MaxHeightOfModel: Set the max height in Unreal Units of the model that the effect is applied to. Its important so the effect can span correctly across the model. You use the grid or ruler inside of UE4 to obtain an estimate. Another way is to set the materialize amount to 0.99 and continually adjust the height until the effect is barely no longer showing which seems to be the fastest and effecient.
FringeDisplacement: Set the intensity of the fringe displacement. This will be how far out the material extrudes from the model surface. If set too large, it can appear spikey and that is not what you want. By default, the effect is scaled for larger models so you will probably want to drop it considerably for smaller models.
Advanced Setup:
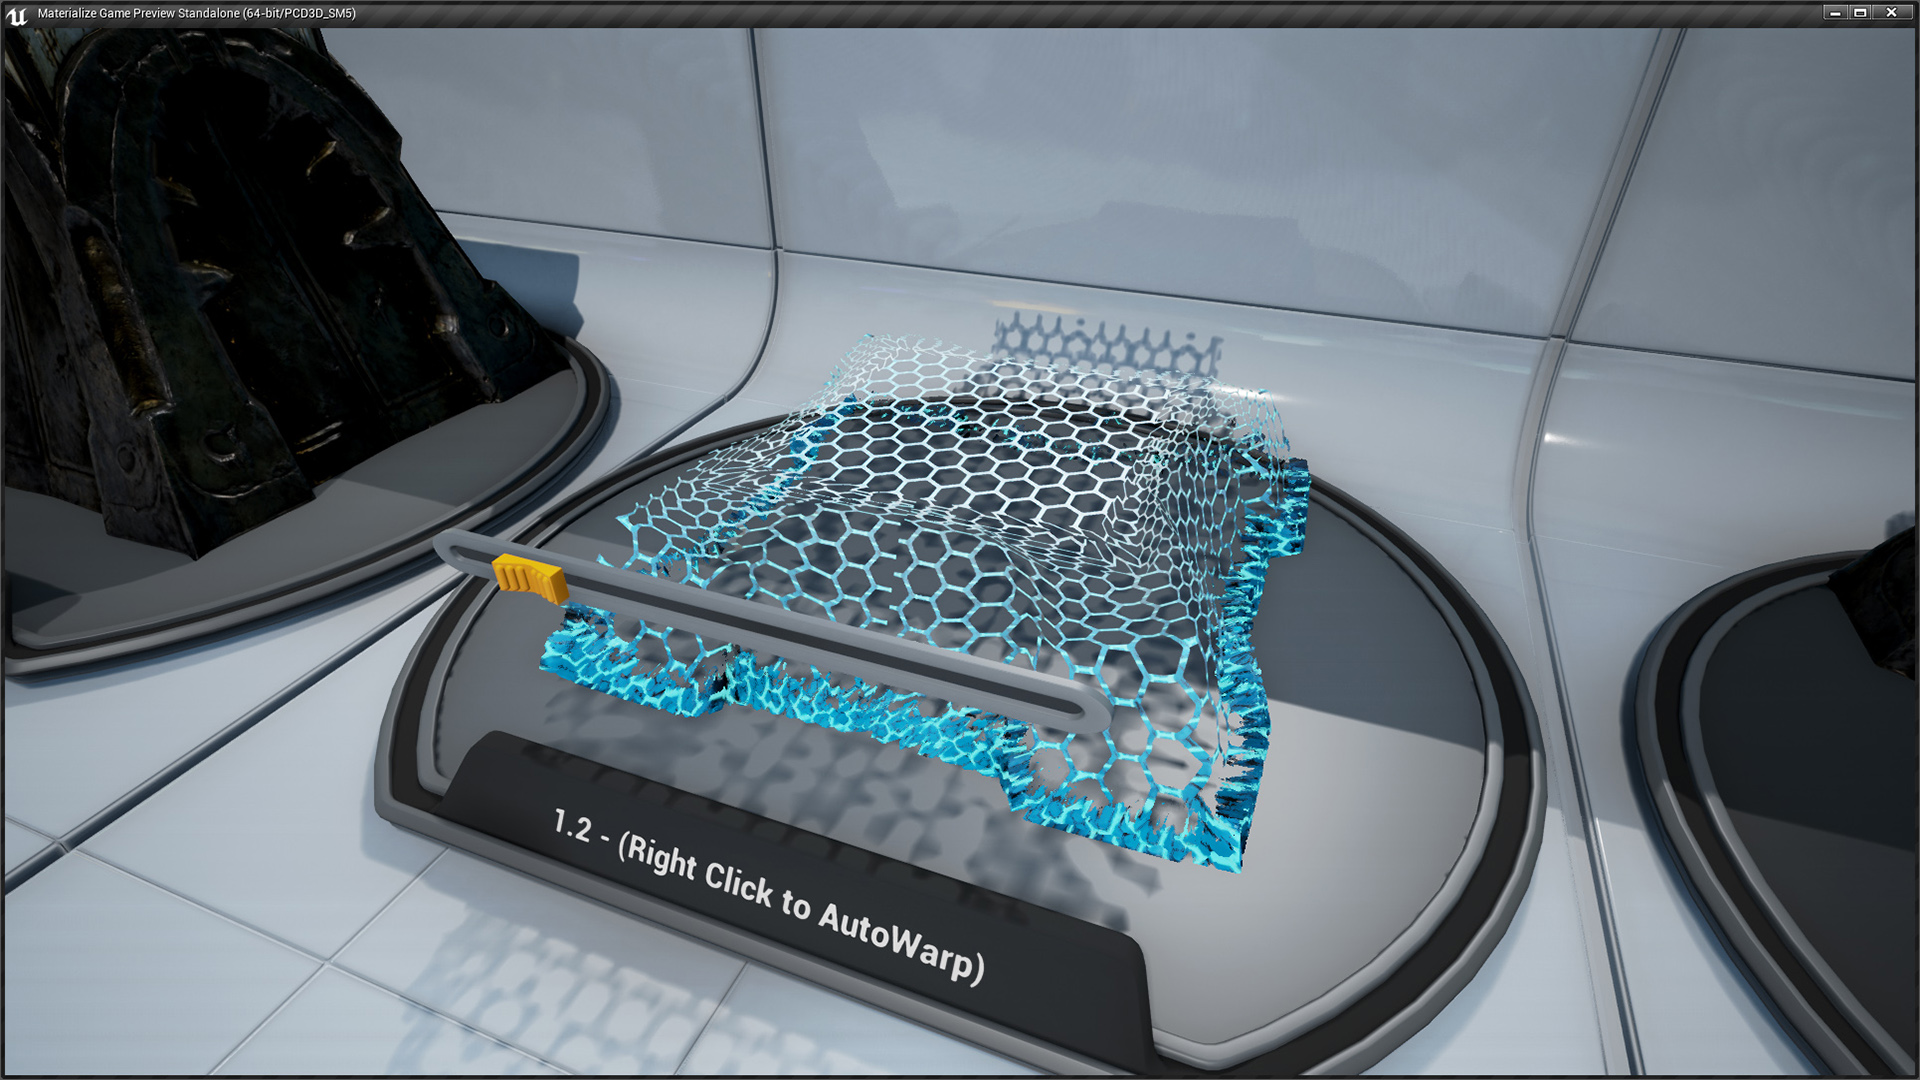
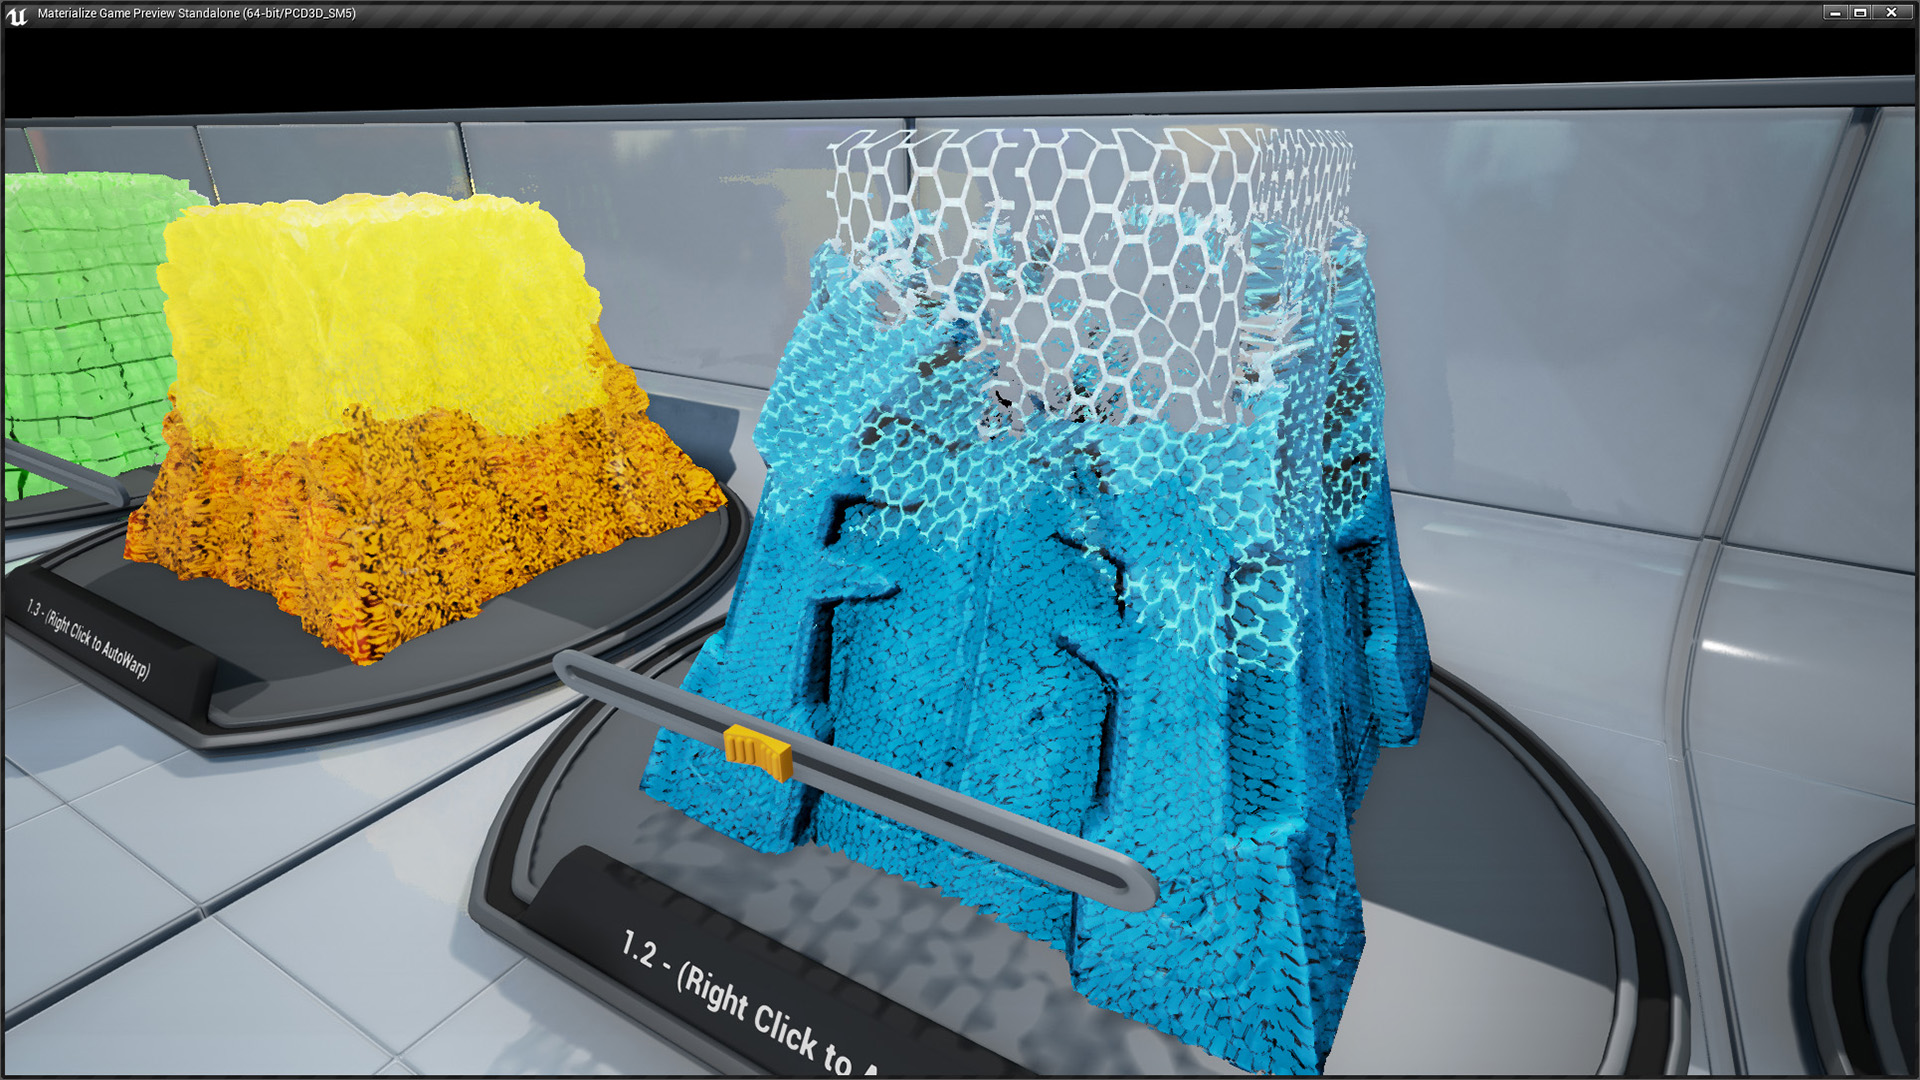
Now that we have the basic and default style setup. We can now explore the different parameter to further customize the look you are going for. You can use the example instances as reference or create completely new looks. The effect is broken up into three distinct transistion parts. The InnerGlow, OuterGlow, & Fringe sections.
When the model is first coming in and has the wireframe look, that is the InnerGlow. Afterwards, the OuterGlow second transistion blends in being a more dense version of the model filling in the holes. The final transistion is the Fringe which blends between the previous layer and the final model material.

DisplaceInnerGlow: Specifies whether or not the inner part is tessellated with noise or is static
InnerGlowAlphaPattern: The actual wireframe pattern look of the first layer.
InnerGlowColor: The color of the inner glow.
InnerGlowIntensity: Controls the amount of bloom of the inner glow
InnerGlowTiling: Controls the density/size of the AlphaPattern used.
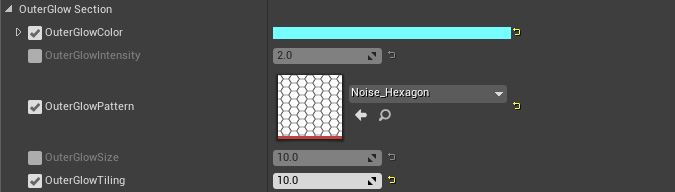
OuterGlowColor: The color of the outerglow and is blended from the innerglow
OuterGlowIntensity: Controls the amount of bloom of the outer glow
OuterGlowPattern: The wireframe pattern of the second layer. I recommend using the same pattern as the innerglow
OuterGlowTiling: The denisty/scale of the pattern. I recommend using 2X the innerglow so it appears to buildup the effect.
OuterGlowSize: The size of the transistion layer. I would avoid extreme numbers or it can drastically change the effect timing

FringeColor: The color blend of the fringe layer transistion
FringePanSpeed: The movement speed of the fringe pattern across the surface of the model
FringeSize: The size of the tranistion layer itself. I would avoid extreme numbers or it can drastically change the effect timing
FringeTesselationMult: The direct input of the tesselation multiplier used. Valid inputs are only 0-2 anything higher is clamped by the engine.
FringeTexture: The final pattern used to tesselate the surface of the model. I recommend using the same pattern here also
FringeTiling: The density/scale of the FringeTexture. I recommend using 2X the outerglow so it appears to buildup the effect.
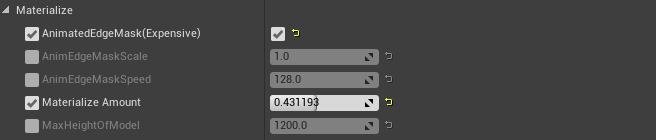
There are two sets of options that toggle display when changing the AnimatedEdgeMask checkbox. Here is if you are using the animated option:
AnimatedEdgeMask: This option creates an animated edge at the top and bottom edges of the fringe layer. It is one of the more expensive options if used. Its not as expensive as opacity though.
AnimEdgeMaskScale: This adjusts the scale of the edge mask. It will create more distortions or spread a single distorion across the fringe layer
AnimEdgeMaskSpeed: This adjusts the speed of the edge distortion across the fringe layer.

The other set of options shown here only show up, if the Animation option is unchecked.
StaticEdgeMask: The texture mask to break up the Fringe edges. Only the Red channel is used for the shader calculation.
StaticEdgeMaskTiling: The texture scaling of the static mask
Optimization Options

Overall, the effect is really good on shader complexity but if you want to push the complexity down even further for lower hardware here is where to start.
Opacity: The biggest cost of the effect is using the opacity node to cut out the holes inside of the model. You can not use the opacity connection without breaking the effect.
Animated Mask: The animated mask is generated procedurally with noise node multiplication. You can turn this option off and just use a static mask to break up the transistion edges.
Tessellation: There are a couple of options in reducing the tessellation cost of the shader such as turning off "Crack Free" in the material attributes. The crack free option requires more overhead to prevent cracks from forming when the tessellation occurs. Secondly, you can turn down the tesselation amount from 2 to 1 for a slight reduction. Finally, you can completely turn off tessellation and not hook up the output connections. This option doesn't not break the effect, it just won't have the 3d extrusions across the fringe layer.
As mentioned before, you can always switch the material of the model during runtime so the idle cost of the model material doesn't have the effect overhead. =)
Troubleshooting:
Alpha Masking: Materials that require alpha masking such as leaves, you can multiply the output of the MaterialVoxelUp node with the leaves alpha mask to fix the effect.
Jagged tessellation: The scenario that you have a model or parts of a model that doesn't look like the pattern input even with the tessellation multipler set to 2(max). The issue is that you don't have enough verts for the tessellation subdivision. You need to import the model with enough verts and evenly distributed across the model. Models can be "Too Low Polygon" for tessellation in some scenarios.
Grey Texturing: The scenario is that everything is hooked up correctly and is double checked. Try removing the "Crack Free" option under the tessellation setting of the material settings. I have ran across one model that didn't like that option partly due to how the uvs were laid out or something to that effect.
Effect not working on part of the model: Its important to have the model imported above the Z origin. If the origin, is in the center of the model, the shader assumes the bottom of the model to be at the zero-Z. Re-import the model above the origin. I may in the future add an option to add this if enough people request it.